Week 4 - Introduction to Design Principles
This week's task was all about using different and new tools in Maya to get the outcome we were looking for. We used the circularise tool this time around, and this mean that we could create a circular shape anywhere within our geometry provided it had 4 faces that could be extruded via offset.
To make this work as desired, first we had to create the 4 faces we would be using, I did this in 2 different ways, one with the "multi-cut" tool and made "edge-loops" around the whole geometry, and the 2nd with a tool called "Poke Face", this gave me the edge flow within my geometry to create. Once the faces had been made, I went on and extruded them to create offset faces, I then circularised these offset faces.
Using these tools and techniques, I created 5 different workshop tools, including: a saw, a mallet, an Allen key, an offset spatula, and a paint scraper. I have attached an image of these tools below:
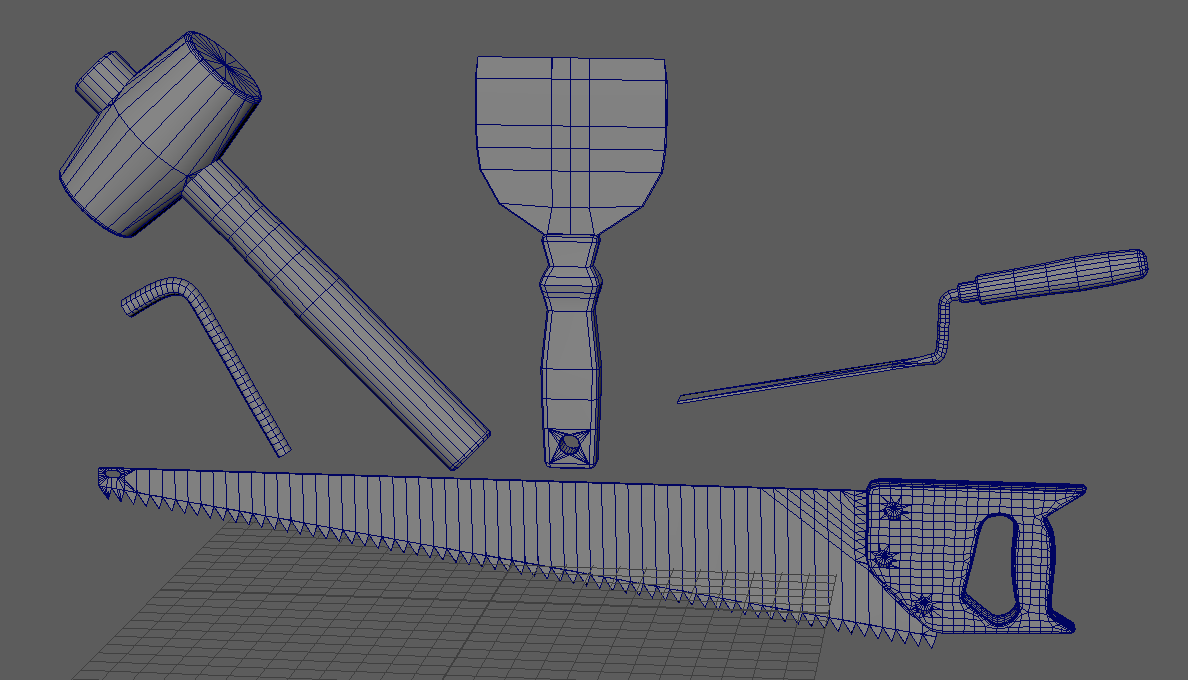
I didn't add a material to these tools as I wanted to keep them as basic as possible. I also tried to keep them as low poly as possible, but with things such as the saw handle, and the tube going from the handle to the metal of the offset spatula, I had to increase the poly count to get the smoothness and curvature I was going for. Overall, I am very happy with the result, I had no NGONs, meaning my topology was correct and would mean no geometry complications when texturing. I would have decreased the amount of verts using the "target weld" tool in an attempt to decrease my poly count, this is something I will look towards in the future to make my edge flow the best it can be.
I enjoyed modelling these, as certain aspects gave me a challenge, such as the saw serrations. I look forward to doing similar projects in the future.
Comments
Post a Comment