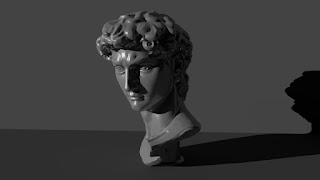
Week 7 - Lights, Camera, and Rendering
This week we focused on using lighting to get certain rendering effects out of the Arnold Extension Maya, for this task we used the "David Bust" model. We had to create 10 different high quality renders, and this task has shown me how huge of a difference lighting can make to a render. We were given examples of what we could do via this website, and we had to take the examples and recreate them in Maya with the David Bust, I chose to recreate the following:
As you can see, they gave lots of drastically different effects. Lighting can be used in so many ways as they can hide or accentuate certain features of a model, or they can just illuminate a render in general. Not only is lighting responsible for this, but so is the angle and distance of the model in correspondence to the camera. When rendering, there were several different settings to adjust to create a high quality render, one of which was the number of samples which had to be at least doubled with the resolution increased to 720p or 1080p, resulting in a very sharp final render.


Comments
Post a Comment